Don't mind the changes here and there!
It's been a good number of years since this entire blog has been updated. But don't worry - new content is coming soon, so stay tuned! :)
Saturday, January 2, 2016
Tuesday, June 11, 2013
Bad to Rad! - DIY clothing alterations and upcycling
Recently, I've been wanting to be a little more fashionable since I'm usually a big bum and wear scrubs most of the time at school!
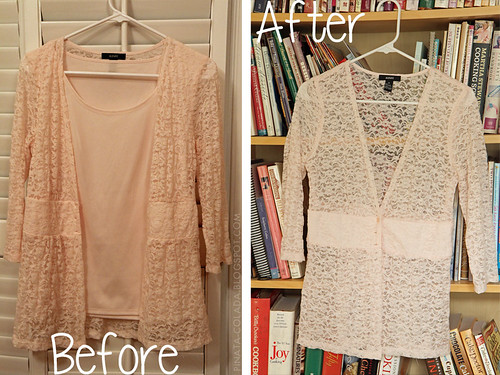
I've always been a fan of upcycling, so I figure I'd try it out for myself. I went to my local Goodwill and picked up a few pieces of clothing to mess around with. Of course they're not the most beautiful (and probably are along the lines of being old lady-ish), but I had a vision for each of them!
The pink lace cardigan/jacket had an ugly stretchy synthetic fabric shirt attached to it. I just simply removed the attached shirt by cutting it out and tying up loose ends to create a cute lace cardigan! I've seen these around in the store for a LOT of money, but this only cost me $5! What a steal! I'm currently considering replacing the buttons with some vintage buttons my mom has, but we'll see.
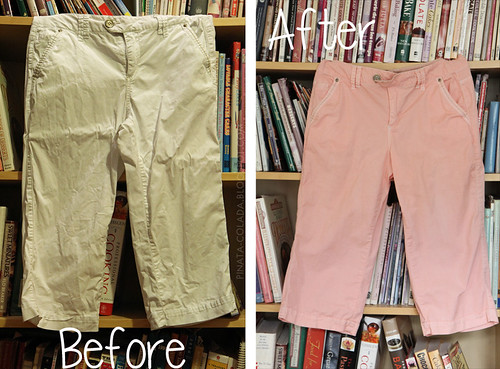
As for this pair of capris , they were fine by themselves, but I really wanted a pair of pastel colored pants for a bird shirt that I had previous bought! I simply bought a bottle of Tulip liquid dye (grapefruit color) and dyed the pants over the stove! I followed the directions on the bottle and it turned out WAY better than I expected!
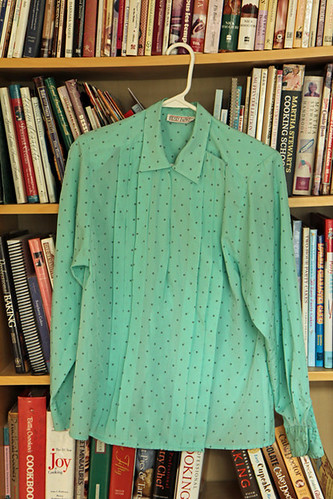
Lastly, I got this grandma shirt that has all of these pleats and this weird fold over flap thing. I really liked the mint green color with the polka dots, so I had to take this one! This one isn't as straightforward as the other two and requires a lot more deconstruction and resewing. I'm not done with this one, but I'll post it when I'm finished!
I've always been a fan of upcycling, so I figure I'd try it out for myself. I went to my local Goodwill and picked up a few pieces of clothing to mess around with. Of course they're not the most beautiful (and probably are along the lines of being old lady-ish), but I had a vision for each of them!
The pink lace cardigan/jacket had an ugly stretchy synthetic fabric shirt attached to it. I just simply removed the attached shirt by cutting it out and tying up loose ends to create a cute lace cardigan! I've seen these around in the store for a LOT of money, but this only cost me $5! What a steal! I'm currently considering replacing the buttons with some vintage buttons my mom has, but we'll see.
As for this pair of capris , they were fine by themselves, but I really wanted a pair of pastel colored pants for a bird shirt that I had previous bought! I simply bought a bottle of Tulip liquid dye (grapefruit color) and dyed the pants over the stove! I followed the directions on the bottle and it turned out WAY better than I expected!
Lastly, I got this grandma shirt that has all of these pleats and this weird fold over flap thing. I really liked the mint green color with the polka dots, so I had to take this one! This one isn't as straightforward as the other two and requires a lot more deconstruction and resewing. I'm not done with this one, but I'll post it when I'm finished!
Monday, June 3, 2013
The good, the bad, and the ugly - Resin take 2 and glazing!
Happy Monday everyone!
Good news and bad news!
THE GOOD
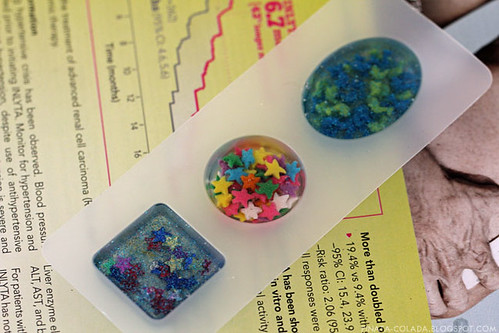
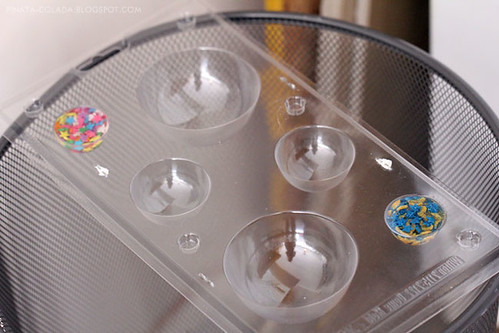
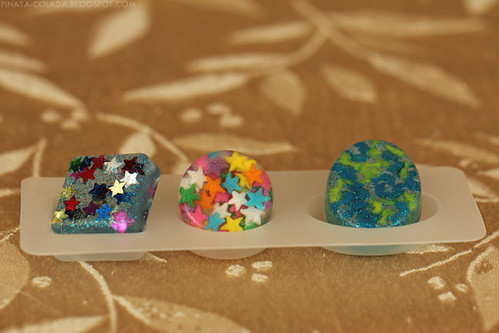
I decided to make some more resin pieces!
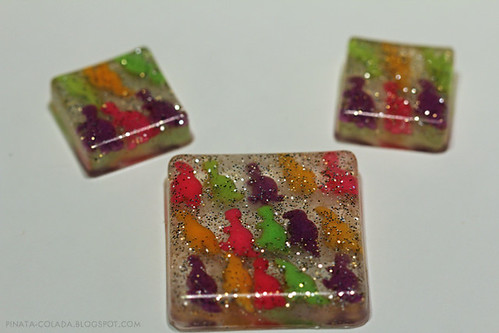
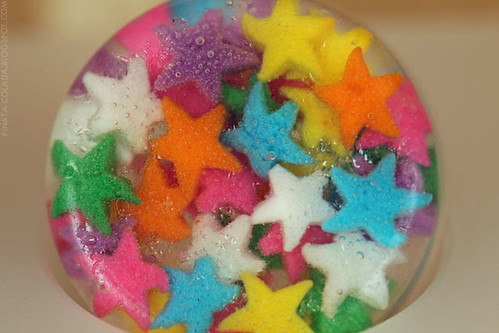
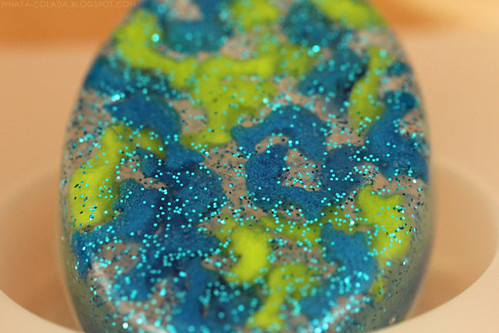
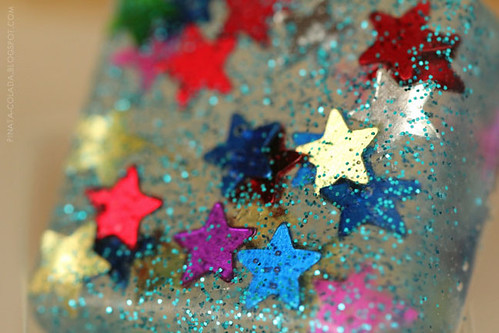
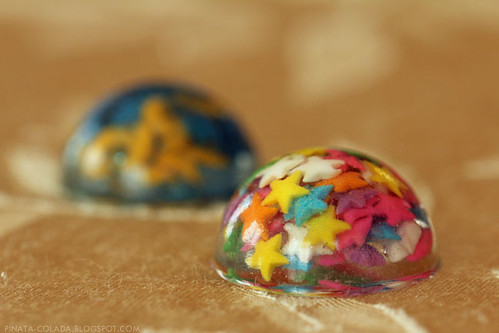
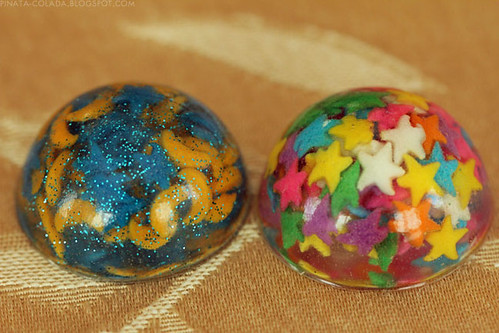
I took some of the sprinkles I had and placed them by hand. I added a little glitter to the resin to add that little special touch.
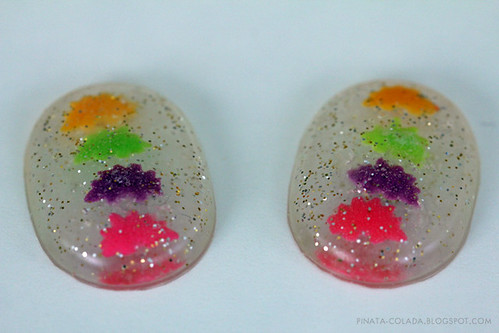
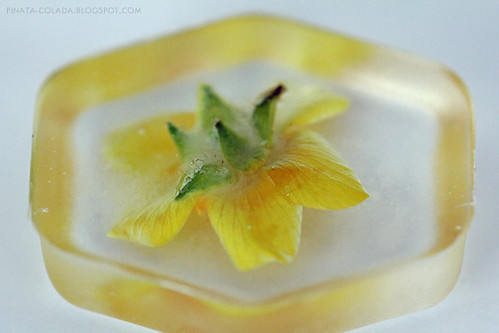
Since we were up in the mountains at the time, I picked some wildflowers outside and tried placing them in some resin. I do like the flowers in resin, but it would have probably looked better if it wasn't so cloudy.
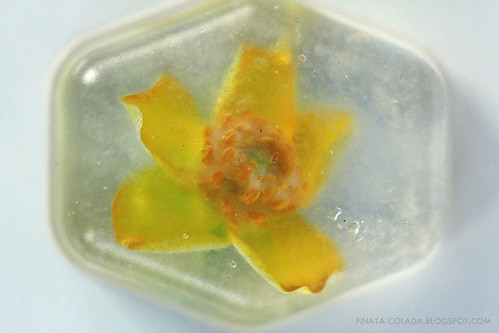
I've started glazing my pieces, which REALLY clears up any cloudiness that happened. At first I used clear nail polish since I had that on hand, but then I swapped to Triple Thick glaze after some research. So lookin good. Yay! :)
THE BAD
I wanted to see what would happen if I put a sticker on resin! I had some old stickers from when I was a kid, so I took an old one that had fallen off its sheet to test things out. I coated it with clear nail polish to protect the sticker and stuck it in. I then placed glitter behind it because it didn't fill the whole area. However, I noticed a bubble inconveniently located next to her nose, so I attempted to move the sticker around in an attempt to move it elsewhere. I successfully moved the bubble, but glitter went places where I didn't want it to go.
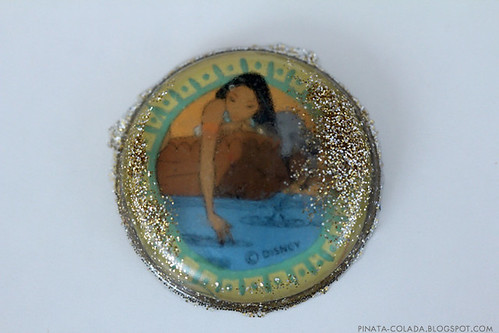
Sorry Pocahontas sticker. You will be missed.
I also tried doing gummy bears, since you can stick food in resin. However, if turned out like this.

Why is it so chunky you ask?
THE UGLY
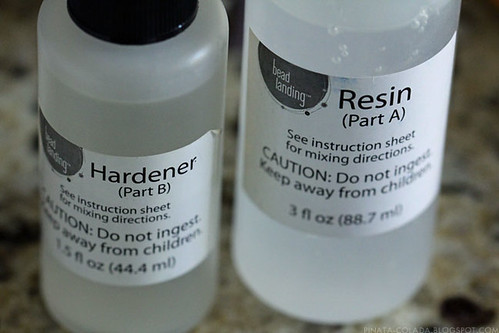
My Bead Landing resin has kicked the bucket before I could use it all. :'( The bottom of the resin was really chunky, cloudy, and crystallized, which messed up some of my pieces. I read online that resin will crystallize over time, so I'm guessing the resin kit I bought had been sitting in Michaels for quite a while. Needless to say, I won't be buying that brand of resin anymore since the packaging doesn't allow for you to see the condition of the resin.
Next time, I'll be trying Easy Cast resin and let you all know how that goes!
Good news and bad news!
THE GOOD
I decided to make some more resin pieces!
I took some of the sprinkles I had and placed them by hand. I added a little glitter to the resin to add that little special touch.
Since we were up in the mountains at the time, I picked some wildflowers outside and tried placing them in some resin. I do like the flowers in resin, but it would have probably looked better if it wasn't so cloudy.
I've started glazing my pieces, which REALLY clears up any cloudiness that happened. At first I used clear nail polish since I had that on hand, but then I swapped to Triple Thick glaze after some research. So lookin good. Yay! :)
THE BAD
I wanted to see what would happen if I put a sticker on resin! I had some old stickers from when I was a kid, so I took an old one that had fallen off its sheet to test things out. I coated it with clear nail polish to protect the sticker and stuck it in. I then placed glitter behind it because it didn't fill the whole area. However, I noticed a bubble inconveniently located next to her nose, so I attempted to move the sticker around in an attempt to move it elsewhere. I successfully moved the bubble, but glitter went places where I didn't want it to go.
Sorry Pocahontas sticker. You will be missed.
I also tried doing gummy bears, since you can stick food in resin. However, if turned out like this.
Why is it so chunky you ask?
THE UGLY
My Bead Landing resin has kicked the bucket before I could use it all. :'( The bottom of the resin was really chunky, cloudy, and crystallized, which messed up some of my pieces. I read online that resin will crystallize over time, so I'm guessing the resin kit I bought had been sitting in Michaels for quite a while. Needless to say, I won't be buying that brand of resin anymore since the packaging doesn't allow for you to see the condition of the resin.
Next time, I'll be trying Easy Cast resin and let you all know how that goes!
Thursday, May 30, 2013
Giga Pudding - DIY giant flan
I gotta admit that I'm a HUGE fan of flan, so when I saw the Giga Pudding commercial I wanted to try it for myself!
(If you've never heard of "Giga Pudding", watch the video below!)
We don't have the official Giga Pudding kit here and I didn't want to spend big bucks on buying a kit online, so I tried making it by myself (aka winging it)!
The kit itself comes with a bucket, giant spoon, and flan mix.
What I used instead were:
- A sand bucket (which was easy to find since it's the summer time!)
- 2 boxes of flan mix (or more depending on how much you want to make)
- Spray oil
- Optional - Sand shovel
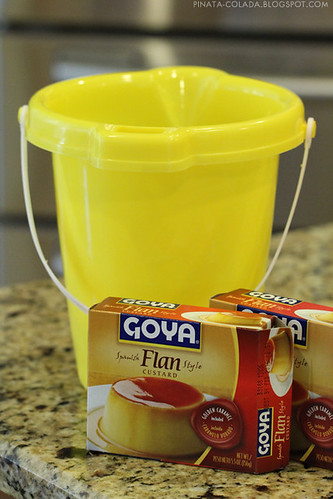
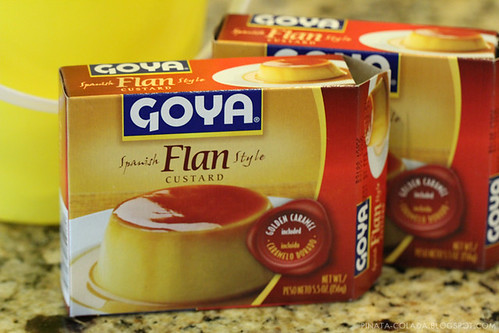
For this project, I used 2 boxes of Goya Spanish-styled flan since my bucket fit about 8 cups and I didn't want to make too much.
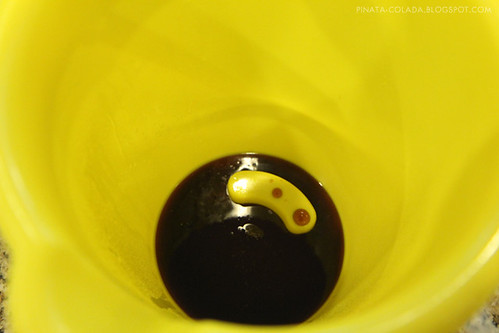
I sprayed the inside of the bucket with oil to make it easier for the flan to come out when the time came to flip it over.
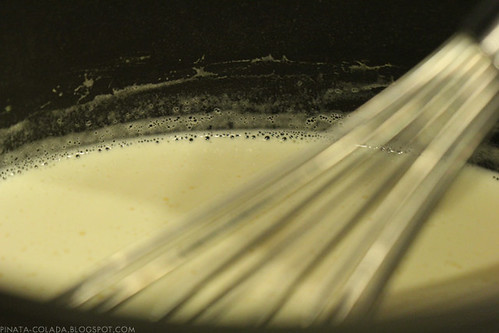
Basically, I followed the recipe written on the box. The boxes came with the caramel topping, so I put that on the bottom of the bucket. This particular type is made on the stove, so I followed the directions and poured it into the bucket afterwards. At first, I was worried about the bucket melting since the flan mixture was so hot, but luckily the plastic was thick enough and nothing happened. Just keep the plastic thickness in mind when buying your bucket (just to be safe)!
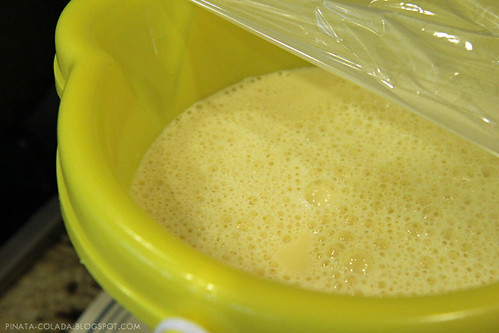
I covered the bucket and put it in the fridge until it's firm. My mom let me know that it was ready at around 6 hours of being in the fridge, but we waited until lunch the next day to eat it.
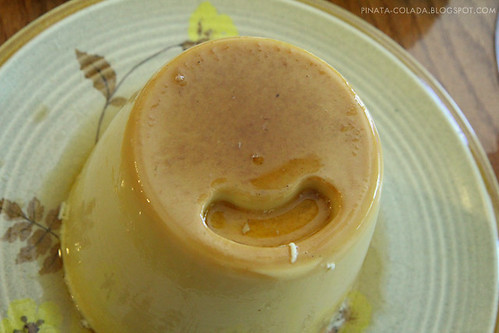
Taking it out of the bucket was probably the most nerve-wracking part. I've seen plenty of real Giga Pudding fails, so I was prepared for failure.
To take the pudding out , I placed a plate on the top of the bucket, and flipped both the plate and the bucket over.
It took some time/wiggling/smacking to get the pudding out, but it finally came out! :)
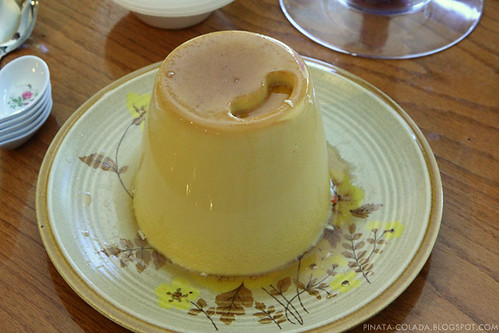
We even took a video of it, so watch the unveiling below!
Overall, great experience, fun, and great for parties, get-togethers, or just because! If you try it, let me know how it goes!
Thursday, May 23, 2013
Dying to dye! - DIY ombre clothing
My wonderful friend Grace called me on Monday wondering if I wanted to have a craft day with her! Of course it was an offer I could not refuse. ;-)
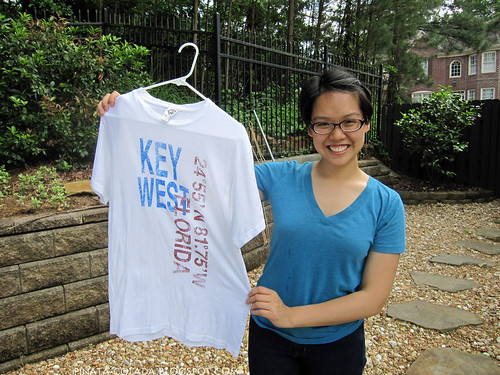
Since I left the choice up to her about what she would like to do, she suggested doing some ombre stuff. I picked up some royal blue Rit powered dye and Grace (who is showing our test t-shirt) brought some clothes for us to mess around with.
We found LOTS of ombre dying tutorials on pinterest, but we kinda decided to wing it and combined a bunch of tutorials together.
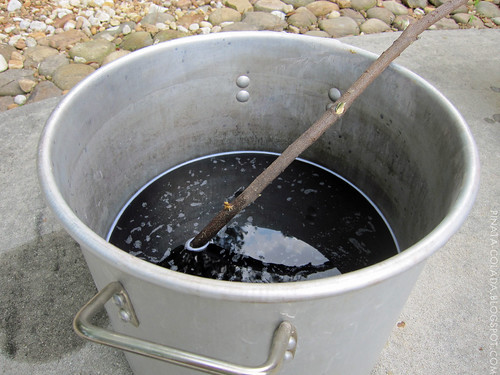
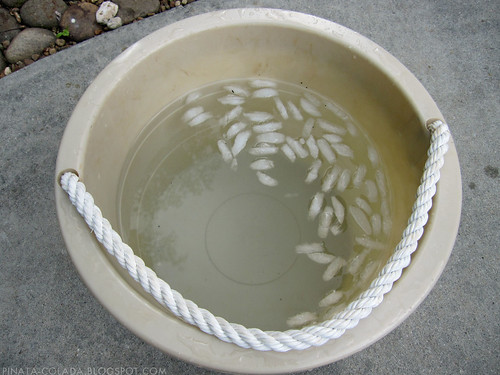
First we prepared the Rit dye according to the off the stove instructions minus 1 gallon of water. We also had a bucket filled with ice and water. Please excuse the ghetto-ness of using a stick as a stirring rod. As I said, we were winging it.
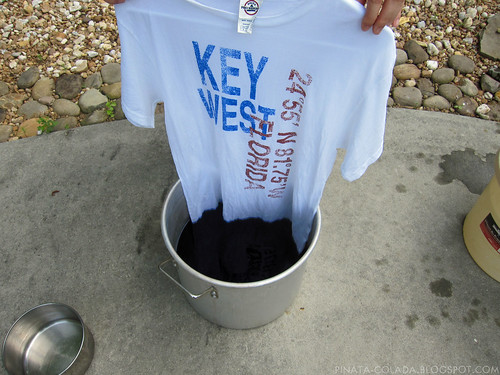
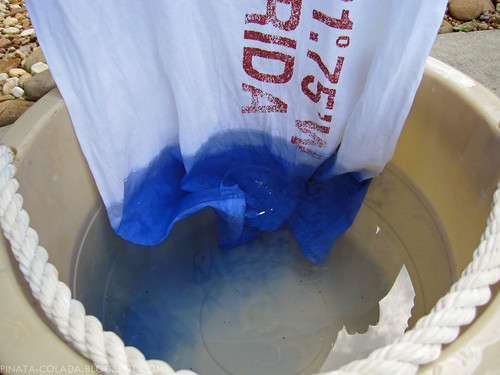
Before dying, we got the clothes wet with water, which apparently is supposed to help the dye climb up the clothes and create a softer gradient.
Then we dipped the bottom of the clothes into the dye bath and allowed some of the dye to climb up the garment a bit above the bath surface.
The dyed clothes were then dipped into the cold water bath a little above where the dye stopped for a bit.
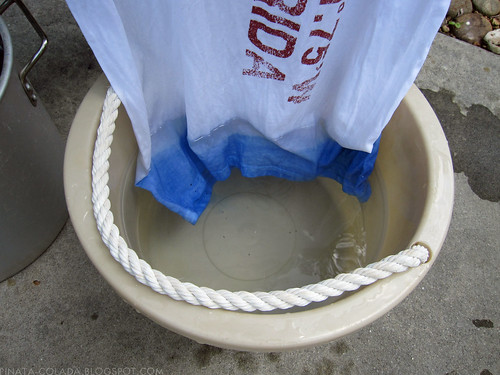
Again, the clothes are dipped in the dye bath higher than where the dye had stopped previously. After allowing the dye to climb, place it in the cold water bath again as before.
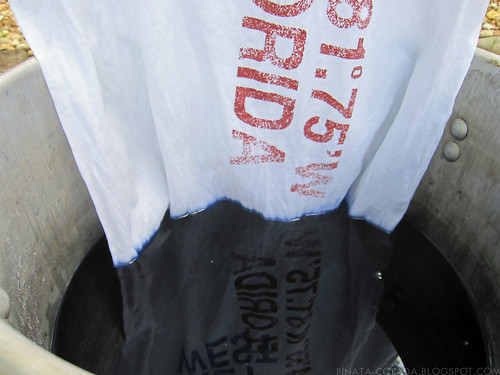
Basically we repeated this process over and over again until we were happy with the results. As Grace pointed out to me, the ombre effect is really due to the TIME that the garment remains in the dye, so keep this in mind if you try this.
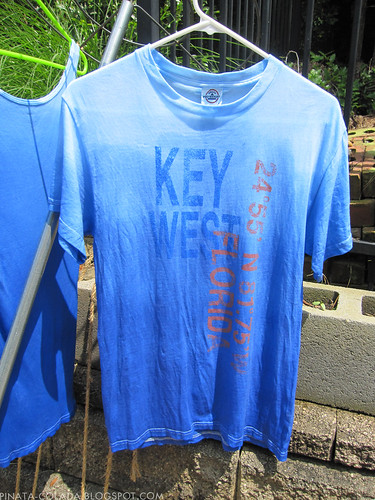
In the end, we were pretty happy with the results and tried it with other clothes!!!
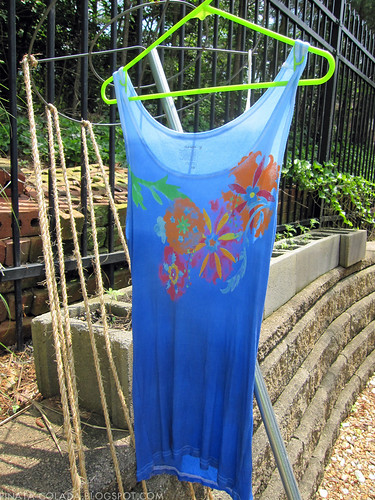
Since I left the choice up to her about what she would like to do, she suggested doing some ombre stuff. I picked up some royal blue Rit powered dye and Grace (who is showing our test t-shirt) brought some clothes for us to mess around with.
We found LOTS of ombre dying tutorials on pinterest, but we kinda decided to wing it and combined a bunch of tutorials together.
First we prepared the Rit dye according to the off the stove instructions minus 1 gallon of water. We also had a bucket filled with ice and water. Please excuse the ghetto-ness of using a stick as a stirring rod. As I said, we were winging it.
Before dying, we got the clothes wet with water, which apparently is supposed to help the dye climb up the clothes and create a softer gradient.
Then we dipped the bottom of the clothes into the dye bath and allowed some of the dye to climb up the garment a bit above the bath surface.
The dyed clothes were then dipped into the cold water bath a little above where the dye stopped for a bit.
Again, the clothes are dipped in the dye bath higher than where the dye had stopped previously. After allowing the dye to climb, place it in the cold water bath again as before.
Basically we repeated this process over and over again until we were happy with the results. As Grace pointed out to me, the ombre effect is really due to the TIME that the garment remains in the dye, so keep this in mind if you try this.
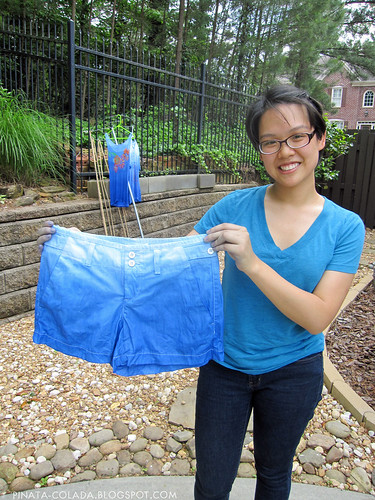
In the end, we were pretty happy with the results and tried it with other clothes!!!
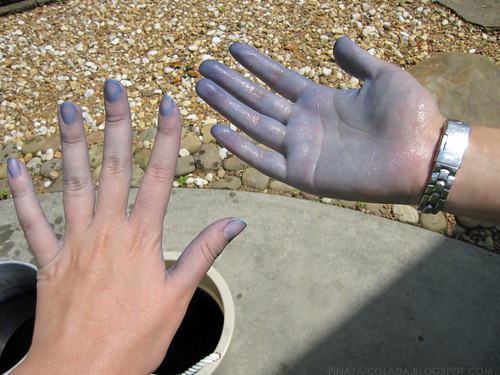
But be warned - you might want to do this with gloves or else you'll end up like this!
Thursday, May 16, 2013
Resin d’Etre – Bead Landing Resin kit review and resin experiments!
Happy Friday everyone!
I’m really really excited to show you this project since I’ve
been thinking about doing this for a long time!
I actually got interested in doing resin late one night
while surfing around on Youtube. I
stumbled upon a video where a girl made some cute resin charms, and proceeded to
search all over Youtube for other resin tutorials. From that point on, I was HOOKED and determined
to try it out!
I proceeded to run over to my local craft stores to look for
things. I found a Bead Landing Resin kit
in Michaels in the jewelry tools area and bought it.
I finally pulled it out after finals were done and had the
adequate space/ventilation to work. The
kit comes with the following:
- A plastic mold with an oval, a circle, and a square
- A stencil with the same shapes
- A bottle of resin and a bottle of hardener
- Stir stick
- A little hand drill
- Measuring cups (like the cough medicine kind)
- Photo paper
- Various jewelry findings
- 3 different necklaces
I decided to try things out by using cake sprinkles (thanks
for the suggestion Mackenzie!) and glitter.
I also decided to use another mold in addition to the one included with the
kit. It’s supposed to be a
chocolate/candy mold, but people online say you can use just about any mold
(silicone molds, paint trays, ice cube trays, etc).
I whipped up 30 mL of resin total and made a total of 5
pieces in the garage. I did notice that
while pouring the resin, the resin was a bit chunky, but the chunkiness went
away when it was mixed with the hardener.
Bubbles also appeared as I stirred since I was initially stirring too
quickly. Thus, it really is recommended
to stir SLOWLY for about 2 minutes and leave the mixture out for 5 minutes
afterwards to allow any bubbles to disappear.
After pouring the resin, bubbles also popped up since I stuck sprinkles
in there. I just tried to take a
toothpick to move them around and try to pop them.
I covered them up to prevent them dust, dog & cat hair,
and bugs from getting in my pieces. I
checked on them during the 2 days it takes to set to make sure they were
working and weren’t accidentally bumped/tipped over.
48 hours later, I popped them out!

The mold that came with the kit was easy to use and the
pieces popped out easily. However, I was
kinda disappointed in that the pieces were kinda cloudy.
As for the candy mold, that took a lot more effort. I read online that you can stick the mold in
the freezer for a bit and it makes it much easier. Luckily for me, this actually worked! These pieces were much shinier possibly
because of a difference in plastic.
There were a few grooves and indents from bubbles on the
surface of the charms, but I’m hoping to fix this when I make my next batch of
resin and coat them with fingernail polish.
Crossing my fingers!
Needless to say I WILL be doing this again with different
molds and different materials! I’ve got
flowers/plants, stickers, and other little trinkets!
Stay tuned for more! :)
Sunday, May 5, 2013
Ch-Ch-Changes and Cake!
Happy weekend everyone (and happy Cinco de Mayo)!
As you can probably tell, I've changed my layout! It's nearing the summer and I felt that my old layout looked kinda blah and didn't fit the fun spirit of this blog very well. Instead of studying for finals (students - don't be like me), I decided to spend a couple days updating and changing things! Now I gotta say that we're on track now. :) Also, had to learn a little about coding this week since the template that I used had LOTS of things that I didn't like or that were broken. You learn something new everyday, right?
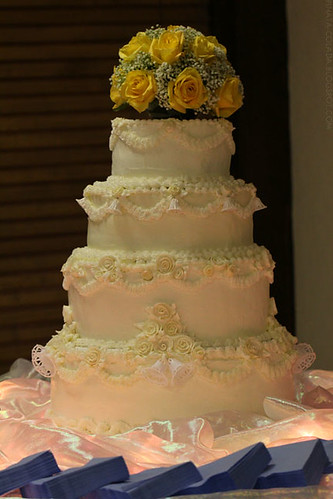
And now onto this week's highlight - WEDDING CAKE!
A friend asked my mom to do her wedding cake, so she's been busy working on it this week. Before we moved, Mom used to have a cake business that she ran out of our home and made cakes, cupcakes, and more of all sorts of occasions. Needless to say, we always had cake and desserts around! Now my mom does it more as a hobby and only by request.
I'll be working on a website for my mom this summer, so I figure I'd take some nice pictures to help her compile a photo gallery of up to date stuff. However, I was a big dummy and forgot to pack my other lenses, so I basically used my macro lens for everything.
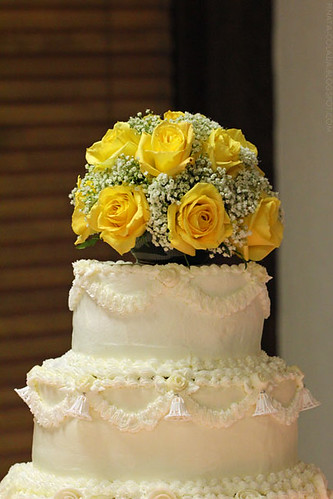
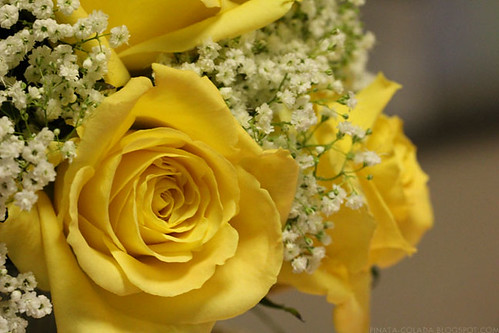
The Bride's colors were white, yellow, and blue, so for the top piece we used yellow roses and baby's breath. I actually did the arrangement, so I gotta admit that I'm pretty proud of it!

Needless to say, overall my mom did a very good job and I'm very proud of her!
Yay mommy!
As you can probably tell, I've changed my layout! It's nearing the summer and I felt that my old layout looked kinda blah and didn't fit the fun spirit of this blog very well. Instead of studying for finals (students - don't be like me), I decided to spend a couple days updating and changing things! Now I gotta say that we're on track now. :) Also, had to learn a little about coding this week since the template that I used had LOTS of things that I didn't like or that were broken. You learn something new everyday, right?
And now onto this week's highlight - WEDDING CAKE!
I'll be working on a website for my mom this summer, so I figure I'd take some nice pictures to help her compile a photo gallery of up to date stuff. However, I was a big dummy and forgot to pack my other lenses, so I basically used my macro lens for everything.
The Bride's colors were white, yellow, and blue, so for the top piece we used yellow roses and baby's breath. I actually did the arrangement, so I gotta admit that I'm pretty proud of it!
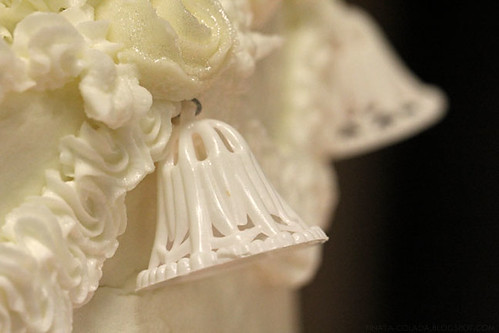
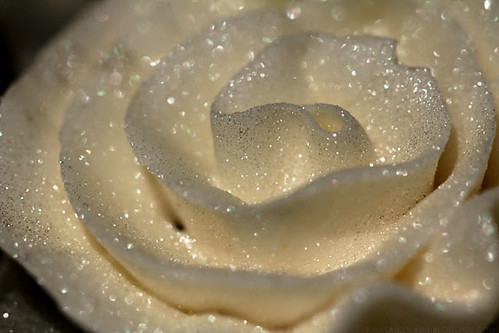
The Bride also picked a cake that included little plastic wedding bells and royal icing roses covered with luster dust.
The cake inside was banana, coconut, and vanilla with strawberries, chocolate, and cream. The icing was a vanilla buttercream. I personally wasn't able to stay because I need to study for upcoming finals, but I previous tried the flavors from the cake tasting session my mom had with the couple. Gotta talk about tasty!
Needless to say, overall my mom did a very good job and I'm very proud of her!
Yay mommy!
Subscribe to:
Posts (Atom)
 Hi! I'm Tiff - crafter, world traveler, and lover of furry creatures and all things delicious.