
Happy Friday everyone!
I’m really really excited to show you this project since I’ve
been thinking about doing this for a long time!
I actually got interested in doing resin late one night
while surfing around on Youtube. I
stumbled upon a video where a girl made some cute resin charms, and proceeded to
search all over Youtube for other resin tutorials. From that point on, I was HOOKED and determined
to try it out!
I proceeded to run over to my local craft stores to look for
things. I found a Bead Landing Resin kit
in Michaels in the jewelry tools area and bought it.
I finally pulled it out after finals were done and had the
adequate space/ventilation to work. The
kit comes with the following:
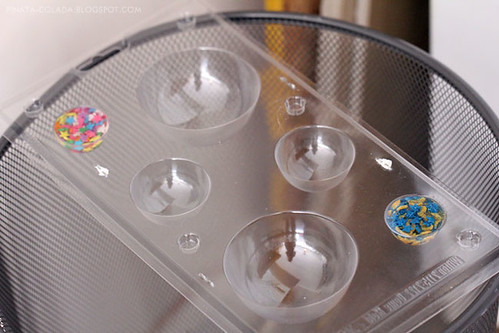
- A plastic mold with an oval, a circle, and a square
- A stencil with the same shapes
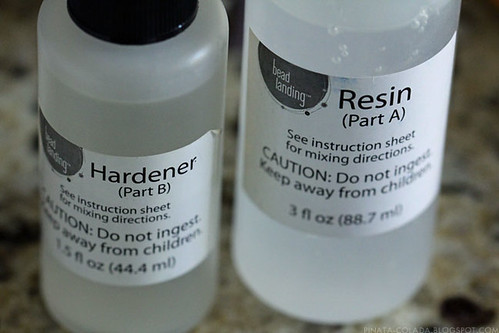
- A bottle of resin and a bottle of hardener
- Stir stick
- A little hand drill
- Measuring cups (like the cough medicine kind)
- Photo paper
- Various jewelry findings
- 3 different necklaces
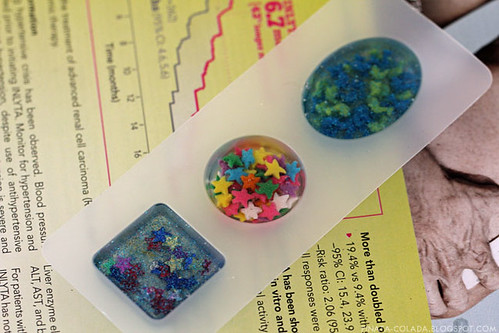
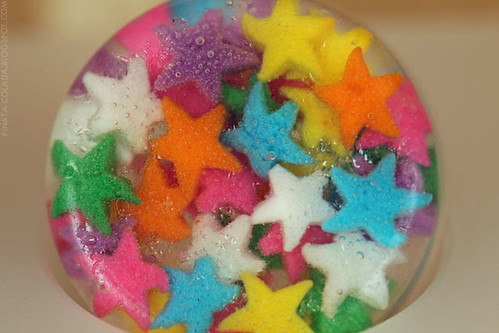
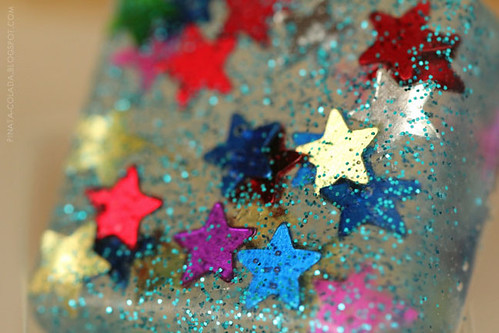
I decided to try things out by using cake sprinkles (thanks
for the suggestion Mackenzie!) and glitter.
I also decided to use another mold in addition to the one included with the
kit. It’s supposed to be a
chocolate/candy mold, but people online say you can use just about any mold
(silicone molds, paint trays, ice cube trays, etc).
I whipped up 30 mL of resin total and made a total of 5
pieces in the garage. I did notice that
while pouring the resin, the resin was a bit chunky, but the chunkiness went
away when it was mixed with the hardener.
Bubbles also appeared as I stirred since I was initially stirring too
quickly. Thus, it really is recommended
to stir SLOWLY for about 2 minutes and leave the mixture out for 5 minutes
afterwards to allow any bubbles to disappear.
After pouring the resin, bubbles also popped up since I stuck sprinkles
in there. I just tried to take a
toothpick to move them around and try to pop them.
I covered them up to prevent them dust, dog & cat hair,
and bugs from getting in my pieces. I
checked on them during the 2 days it takes to set to make sure they were
working and weren’t accidentally bumped/tipped over.
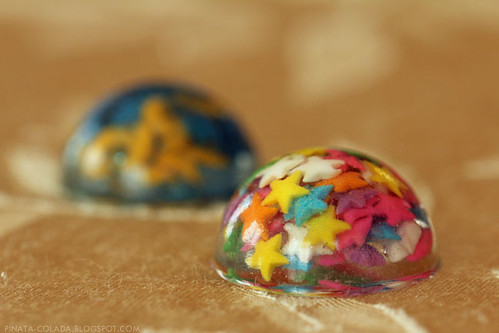
48 hours later, I popped them out!

The mold that came with the kit was easy to use and the
pieces popped out easily. However, I was
kinda disappointed in that the pieces were kinda cloudy.
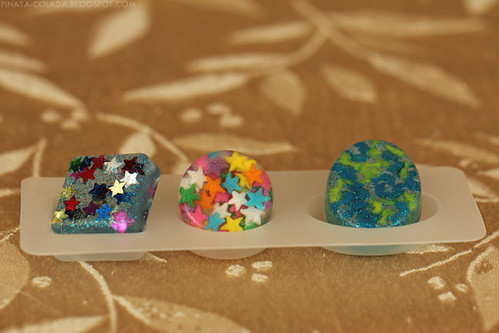
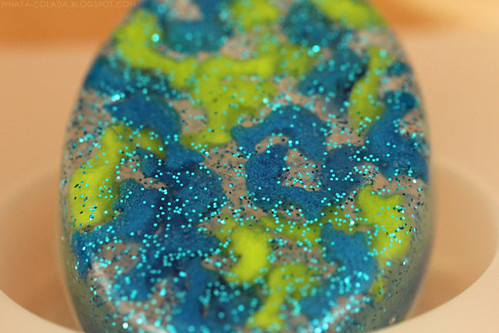
As for the candy mold, that took a lot more effort. I read online that you can stick the mold in
the freezer for a bit and it makes it much easier. Luckily for me, this actually worked! These pieces were much shinier possibly
because of a difference in plastic.
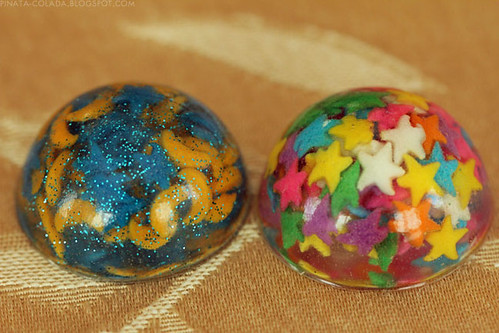
There were a few grooves and indents from bubbles on the
surface of the charms, but I’m hoping to fix this when I make my next batch of
resin and coat them with fingernail polish.
Crossing my fingers!
Needless to say I WILL be doing this again with different
molds and different materials! I’ve got
flowers/plants, stickers, and other little trinkets!
Stay tuned for more! :)
 Hi! I'm Tiff - crafter, world traveler, and lover of furry creatures and all things delicious.


0 comments:
Post a Comment